From blog to bot: build a RAG app to chat with your favorite blogs
Step-by-step RAG guide, from data ingestion to production monitoring (Burr, dlt, LanceDB, OpenTelemetry)
Around 41% of Python developers rely on blog articles as a learning resource according to the Python Developer Survey 2023 by JetBrains! As a format, blogs are great at delivering up-to-date insights, diverse perspective, and cover niche topics.
However, the blogs constitute a fragmented ecosystem (blogging platforms, personal websites, company blogs, etc.) which can make it difficult to browse content or find posts you liked.
To tackle these problems, we’ll build a personal knowledge base from our favorite blogs and use retrieval augmented generation (RAG) to search through content using a chat interface. We’ll use a combination of open-source Python tools to progress towards a production-ready application!
Outline
Ingest blog articles with
dltandLanceDBBuild a RAG application with
BurrandLanceDBMonitor a RAG application with
OpenTelemetryandBurr UI
Follow along via the GitHub repository
1. Ingest blog articles
While blogs are scattered across the web, most of them adhere to the RSS (or the similar Atom) standard format for publishing and subscribing to content updates. The RSS specifications define required and optional fields to describe the channel and its entries (i.e., the blog website and its articles). Note that even if the fields are standard, how they’re used and the information they contain can vary greatly between feeds.
Finding the RSS feed
Even though not many people interact with it directly, an RSS feed is available on most blogging sites, even personal ones built with popular frameworks! If there’s no visible RSS icon or link, you can find its URL with the browser’s developer tools. Hit F12, then under the Elements tab, use CTRL + F to access the search bar and look up rss, atom, and feed to try to the RSS link.

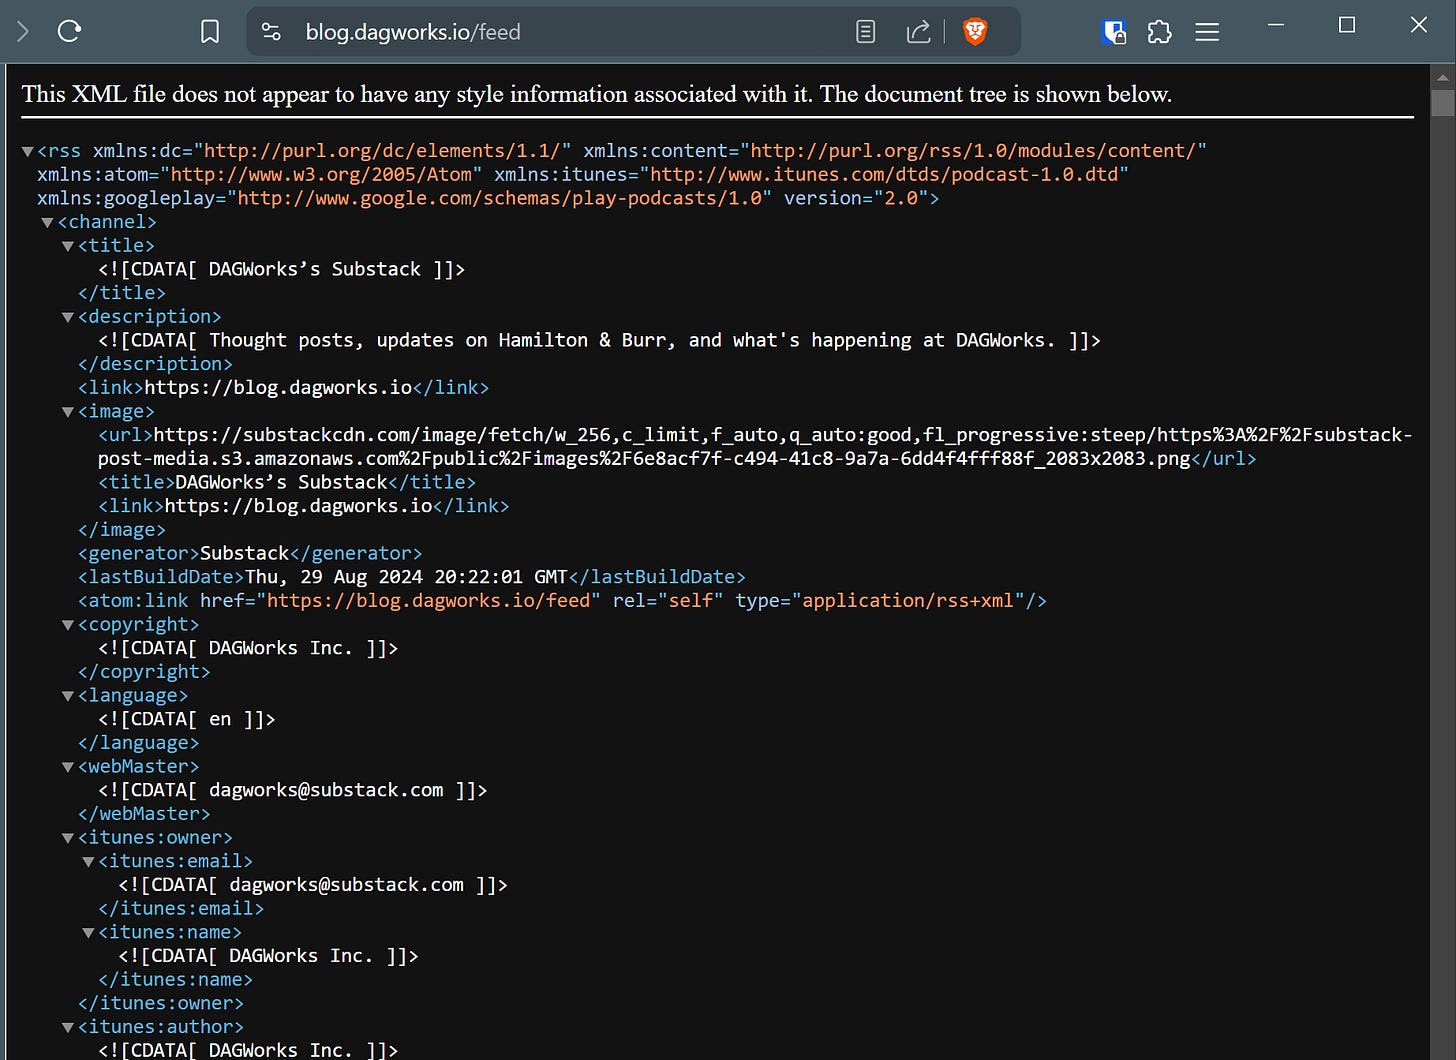
When you access that link, you’ll find a not-so-human-friendly XML page. If you’re lucky, it will have some formatting and interactivity, but it’s not always the case.
Retrieving RSS entries using Python
Luckily, no need to manually parse XML because the feedparser library takes care of it! The documentation is also an awesome resource to learn more about the RSS specifications.
All you need to do is to make an HTTP request to the RSS feed and give the response to the feed parser.
Then, you can use this object to access information about the RSS channel and entries
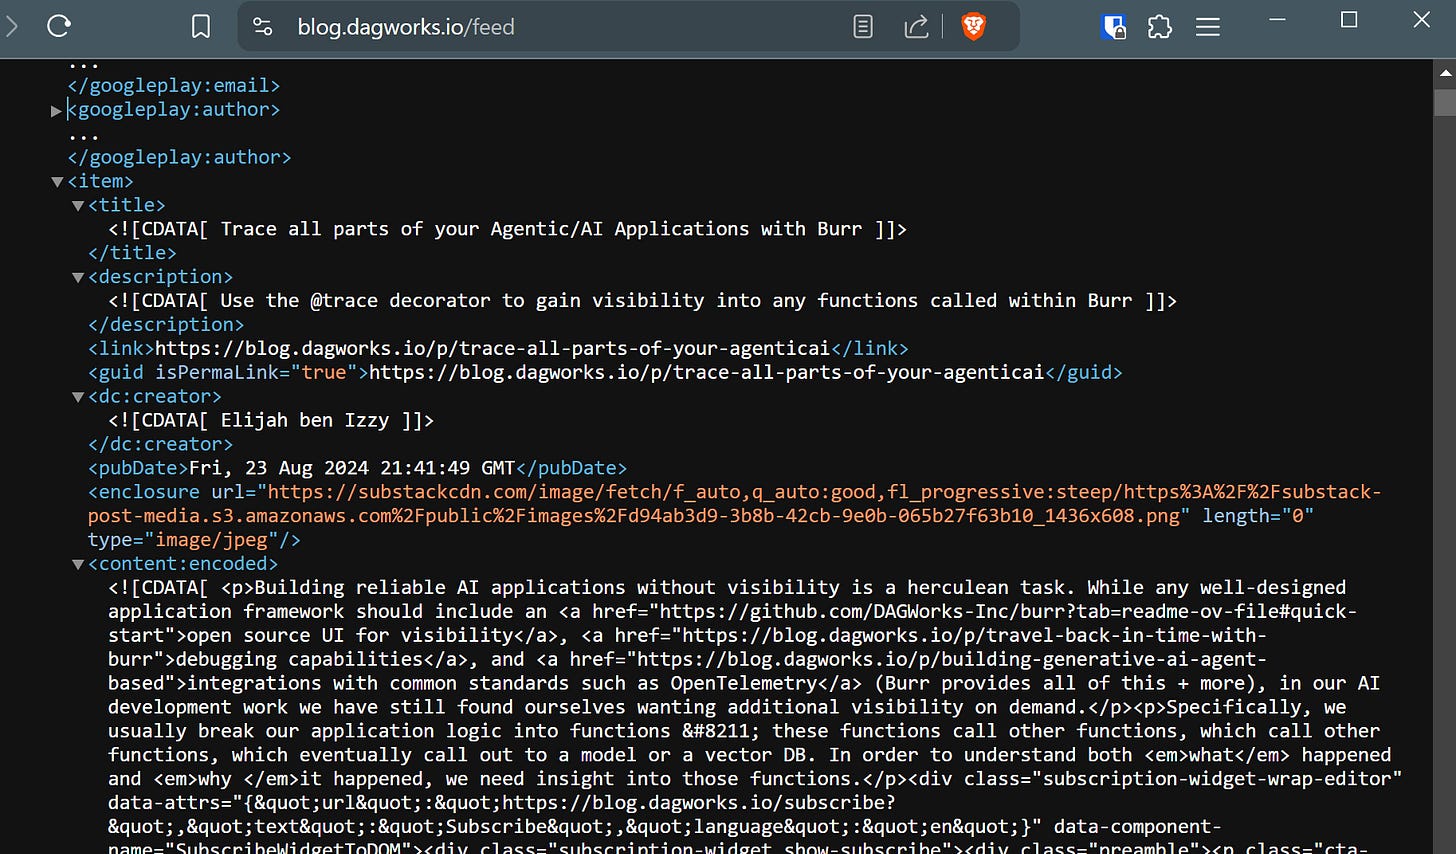
For this tutorial, we’ll be using the Substack RSS feed available at my_substack_url.com/feed because each entry’s field content contains the full HTML page of the blog article. We can actually see it in the <content:encoded> tag from the browser.
For blog sites that don’t include the full HTML, you will have to use the entry’s link attribute to make another HTTP GET request and retrieve the HTML page.
Storing RSS entries in a database
Now, we need to decide how to store blogs. The library dlt, the “data load tool”, makes it trivial to convert a Python dictionary into a table schema and store objects in a database.
First, we use the @dlt.resource decorator to create a Resource that gets an RSS feed, iterates over available entries, and yield a dictionary per entry.
To ingest data into a LanceDB database, all we need to do is create a Pipeline object with the destination "lancedb" and set a pipeline name. Then, executing the pipeline by passing the rss_entries to the .run() method will create the database and start populating it.
Simply change the URL given to the function rss_entries(rss_feed_url=) in order to ingest other blogs!
Text processing for RAG
So far, we stored large HTML blobs. To create a good RAG application, we also need to clean the text and create right-sized chunks to provide meaningful information to the LLM. For this purpose, we create simple functions cleanup_html(), split_text(), and contextualize(). They respectively remove tags from an HTML string, split the text on punctuation (. ! ?), and uses a rolling window to join chunks into larger windows. Having some overlap between chunks is helpful during retrieval.
Note that you can use any text processing library for this step (unstructured, LlamaIndex, LangChain, etc.)
To apply these transformations, we create a simple function text_chunks() with the @dlt.transformer. It takes in an RSS entry produced by the rss_entries resource and yields “contextualized” chunks from the entry.
Compared to the earlier code, we use the pipe operator | to indicate that the data from rss_entries should flow into the text_chunks transform step.
Embedding text and storing vectors
An embedding is a vector representation of a text string. For RAG, we want to store each text chunk with its vector representation to enable vector search (also called semantic or similarity search). When the user asks a question our application, we’ll embed its query (i.e., create a vector), search for nearby vectors, and retrieve their associated text chunk.
For this purpose, we’ll use the vector database LanceDB. One key feature is the ability to delegate it the responsibility to compute embeddings. This simplifies RAG applications because it avoids having to write code to generate vectors and move them around. Other benefits will become apparent in the section 2. Build a RAG application. Also, the LanceDB + dlt integration means we can embed our text chunks at ingestion with a single line of code.
Compared to the previous snippets, we give the rss_entries(...) | text_chunks object to the lancedb_adapter an specify to embed the field text.
Note that LanceDB + dlt will require a few lines of configurations to specify which embedding provider and model to use, and the necessary API keys.
Next steps: Scheduling data ingestion
Next step would be to deploy and schedule the dlt pipeline to run every day. While this sound daunting, dlt has a straightforward walkthrough in their documentation. Also, the support for incremental loading means it can automatically avoid ingesting the same document multiple time and wasting API calls for embeddings, which can be costly at scale. We leave this exercise to the reader!
2. Build a RAG application
“Retrieval augmented generation” is a set of techniques rather than a specific algorithm. Burr is a framework to write the logic of RAG applications, and LLM agents more generally, as a graph. By using the concepts of action and state, the behavior of complex agents can always be visualized and debugging becomes easier.
Burr also solves many challenges to productionize agents including monitoring, storing interactions, streaming, and more, and comes with a rich open-source UI for observability (see 3. Monitor a RAG application).
Writing RAG logic
For this tutorial, we’ll write a simple chatbot that receives a user query, retrieves relevant blog chunks, and returns an LLM-generated answer.
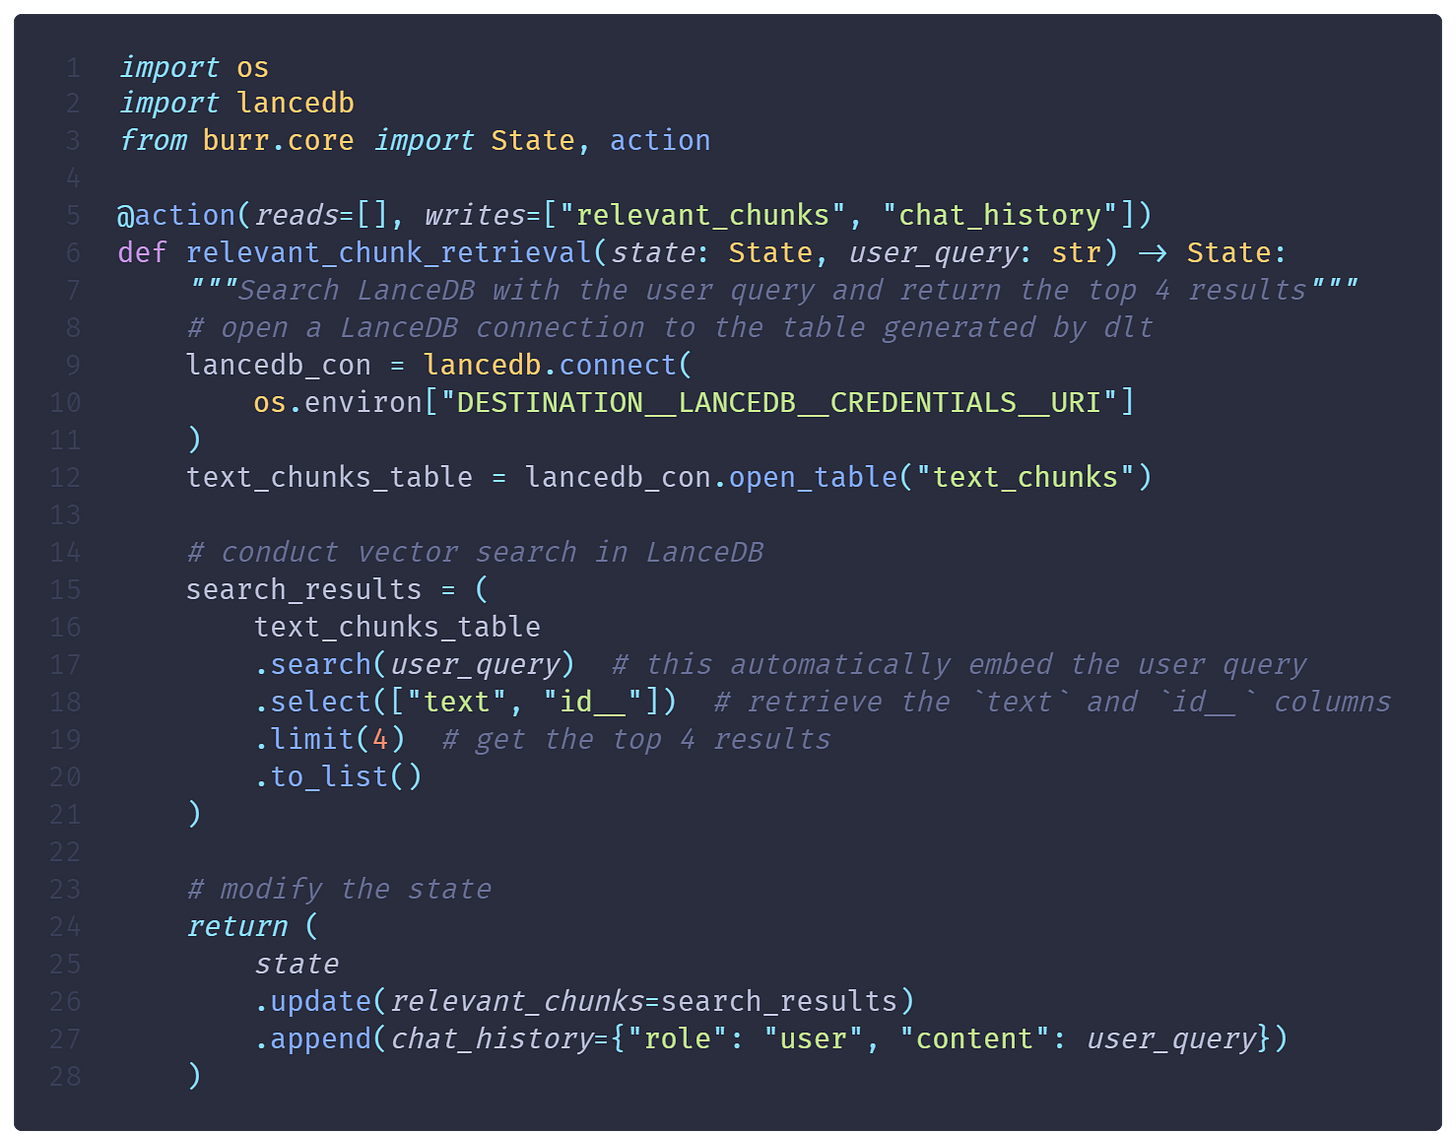
To define actions, we use the @action decorator, which specifies the values it reads from and writes to the State. Also, the function must take a State as the first argument and return a State object.
The action relevant_chunk_retrieval() takes in a text input user_query, searches for most relevant chunks, and updates the state with the retrieved chunks and user query. Notice how simple the LanceDB code is. The embedding for the user’s query is automatically computed and used for similarity search.
The second action bot_turn() uses the OpenAI Python client to send a chat completion request to gpt-4o-mini. The key element of RAG is including the relevant chunks of information in the prompt sent to the LLM. Using Burr makes very clear how data moves through the application and the observability features allow to inspect in detail each step (see 3. Monitor a RAG application).
Assembling the RAG application
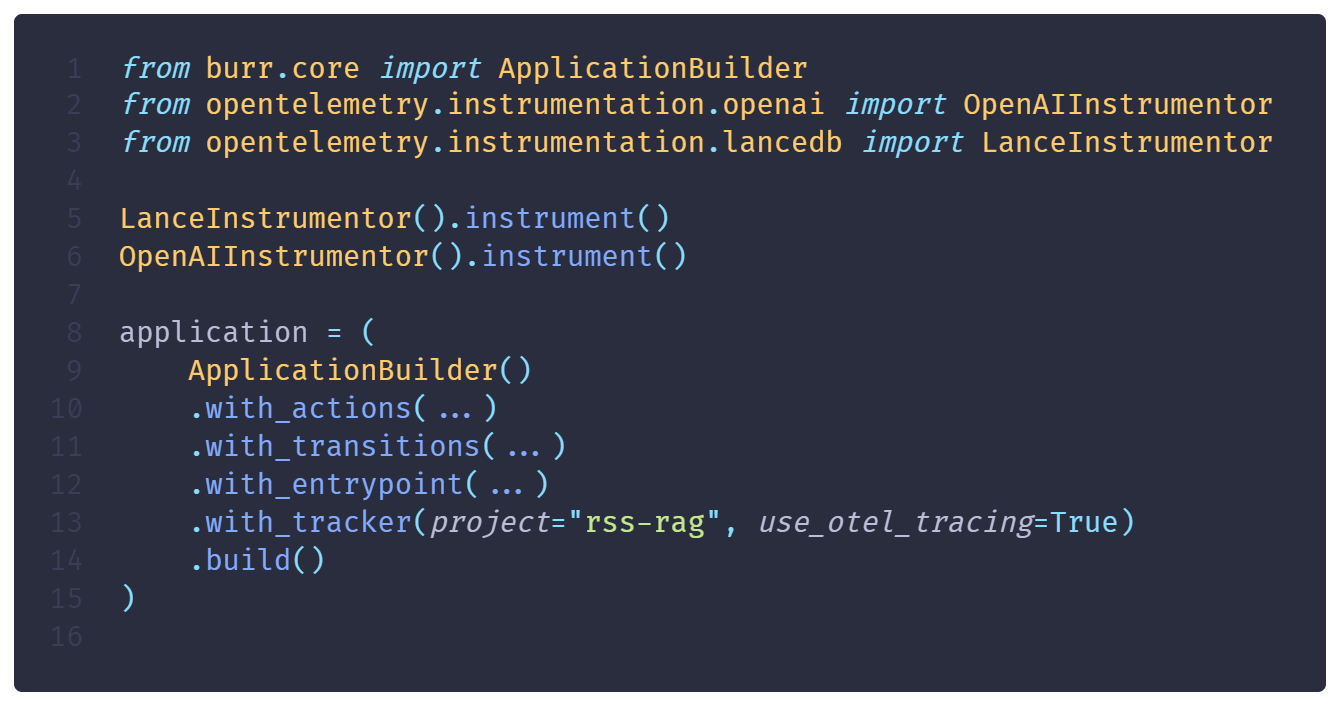
To build a Burr Application, you need to pass it actions and define valid transitions as tuples (from, to). The application must also define an entrypoint from where to begin execution. In this case, the RAG chatbot can only go from relevant_chunk_retrieval -> bot_turn and bot_turn -> relevant_chunk_retrieval. Finally, calling the .build() method on the ApplicationBuilder() will return the Application object.
Launching the RAG application
Since a Burr Application is a simple Python object, you can launch and try it from a notebook or a script during development one of these options:
.run(...)will execute the application until it hits a specific condition.iterate(...)allows you to execute it in aforloop where you can manually handle conditions.step(...)will execute a single action and wait for further instructions (great for debugging)
Note there exists
asyncalternatives.arun(),.aiterate(),.astep()
Below, we launch the application with .run() and make it halt after the action bot_turn. We must provide a dictionary of inputs that includes a value for user_query since it’s required by the relevant_chunk_retrieval action.
This will complete one loop user_query -> relevant_chunk_retrieval -> bot_turn and return a state object that contains the chat_history with the chatbot’s reply.
Now, converting this to an “open-ended” conversation is trivial! All you need is a while loop to call application.run(...) multiple times. Make sure to have a mechanism to exit the loop (😅) and to provide a new user_query on each iteration (here, we get a new input at the end of the loop)
Next steps: deploying Burr as a web service
As you’ve seen, writing an application with Burr is a matter of defining action and state. It makes developing reliable RAG and LLM agents with predictable and debuggable behaviors much simpler.
Yet, Burr provides also provides a lot of value when it comes to moving your application to production. Via the ApplicationBuilder, it is possible to add many functionalities:
track execution and gather telemetry (which we cover next)
persist the state, allowing to resume later
hooks to send alert and trigger other systems
A next step for the reader would be to deploy the Burr Application as a web service accessible to other users. Here’s a guide on this topic from the official Burr documentation.
3. Monitor a RAG application
This simple RAG application already involves multiple components (agent, vector store, LLM, user interface) and this number could grow (multiple LLMs, caching, routers, web searches). An observable RAG system should help you answer questions about:
User behavior patterns (frequent topics, difficult queries)
Application performance (guardrails, LLM randomness, user ratings)
System performance (latency, throughput, resource usage, API calls)
System errors (bugs from code or the interaction between code and data)
Instrumentation with OpenTelemetry
OpenTelemetry is an open-source cross-language tool that allows to instrument, generate, collect, and export telemetry data (metrics, logs, traces), and constitute an industry-recognized standard (learn more).
Once you enable OpenTelemetry, you need to instrument your code, which means patching your code to produce and report telemetry. Then, auto-instrumentation refers to adding a few lines of code to fully instrument a library. The Python open-source community implemented auto-instrumentation for many popular libraries.
For example, add these 2 lines of code to instrument the requests library:
OpenLLMetry is an open-source Python library that automatically instruments with OpenTelemetry components of your LLM stack including LLM providers (OpenAI, Anthropic, HuggingFace, Cohere, etc.), vector databases (Weaviate, Qdrant, Chroma, etc.), and frameworks (Burr, Haystack, LangChain, LlamaIndex). Concretely, it means you automatically get detailed traces of API calls, retrieval operations, or text transformations for example.
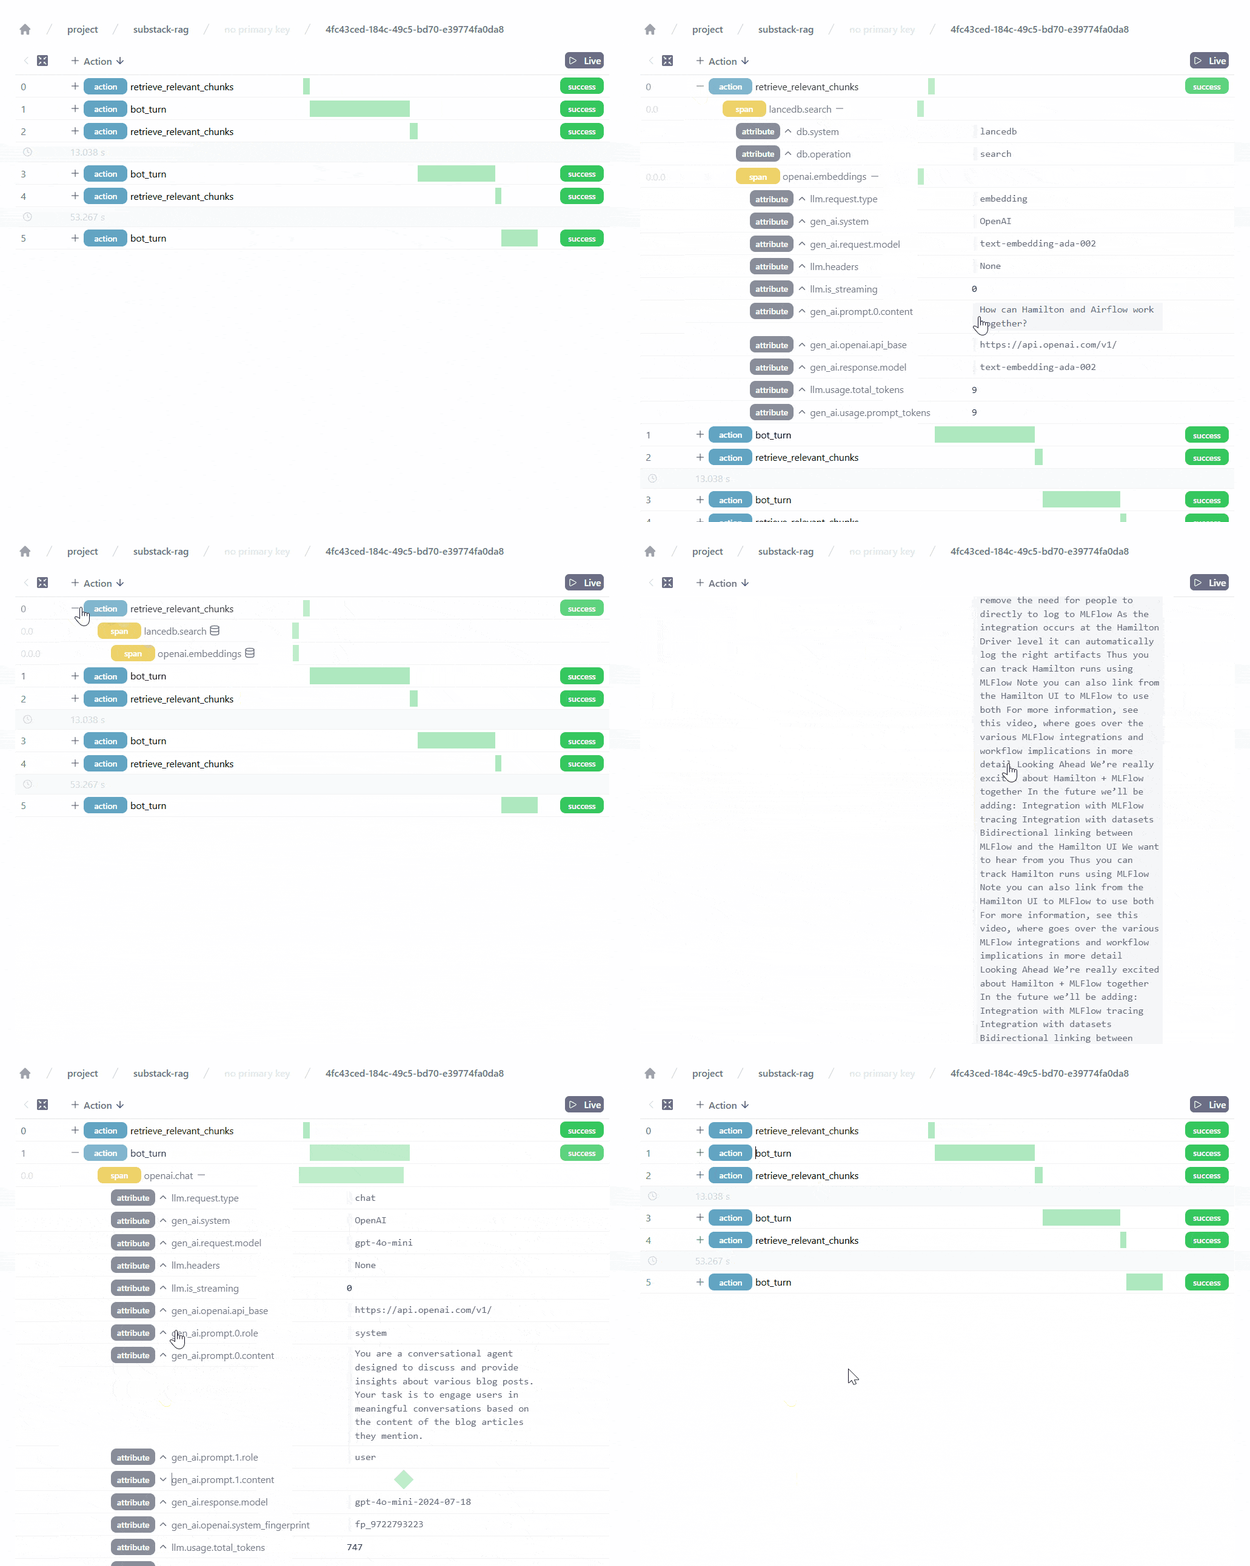
Monitor your application with Burr UI
OpenTelemetry is a middleware, meaning it generates data, but doesn’t provide a storage or dashboard. When using Burr, it can automatically track and store OpenTelemetry data for you, but you can also set up your own OpenTelemetry destination.
To do so, simply add the clause .with_tracker(use_otel_tracing=True) to the ApplicationBuilder. Below, we also instrument the lancedb and the openai libraries used by our RAG application.
Afterwards, launching and using the Application will generate telemetry for Burr to track. Then, using the command burr in your terminal will launch the Burr UI!
Importantly, it allows us to observe our RAG application and precisely track the user requests, the retrieved chunks, the generated responses, etc. The Burr UI is continually improving and has many more features, including:
monitor execution in real time, see it move through states
track attributes such as token counts, latency,
inspect code code failures
create test fixtures from specific states with one click
Conclusion
This blog showed how to kickstart an observable Retrieval-Augmented Generation application over blog articles. Building towards production-readiness, Sections 1. and 2. include next steps to schedule data ingestion and deploy your RAG application via a web service!
More Resources
Join our Discord for help or if you have questions!
Github repository for Burr (give us a star if you like what you see!)


